
LESSON PLAN: Keyboard Hand Positions
Objective
Students will be able to use the put note letter names and finger numbers together to make good keyboard habits.
Resources
Keyboards
Procedures
- Demonstrate playing a C position
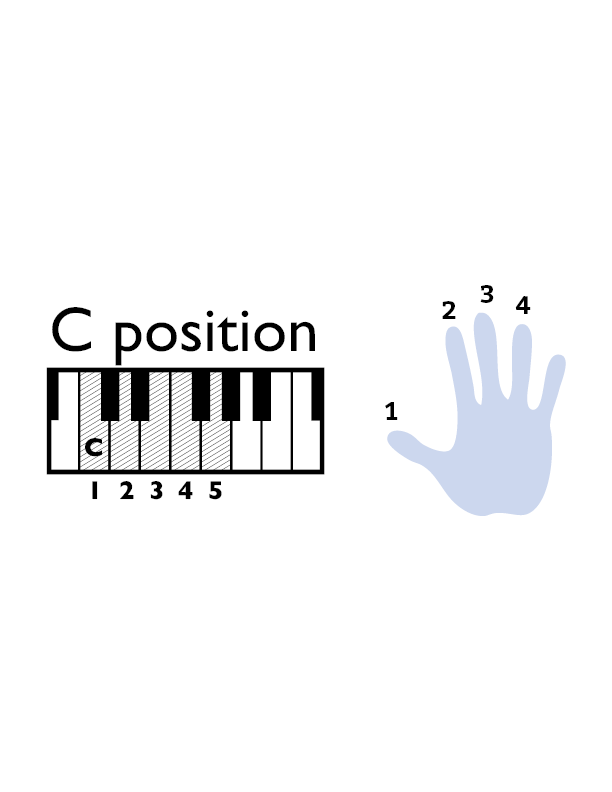 using your right hand by placing your thumb on C and then playing D, E, F, and G with the next fingers (finger 2 for D, finger 3 for E, etc.)
- Identify which fingers play which notes in discussion with students. “If I’m in a C position, which finger number plays the F? Which finger number plays the D?” etc.
- Pair students up having them take turns playing the notes of the C position with the right hand. Ascending will be
 easiest because it starts with the thumb. Descending patterns that go up and down can come later after they’re more comfortable using their fingers on the keyboard like this.
- Have students call out notes for each other that are under the hand position. “Play the note E!” the student will have to use the 3rd finger, etc.
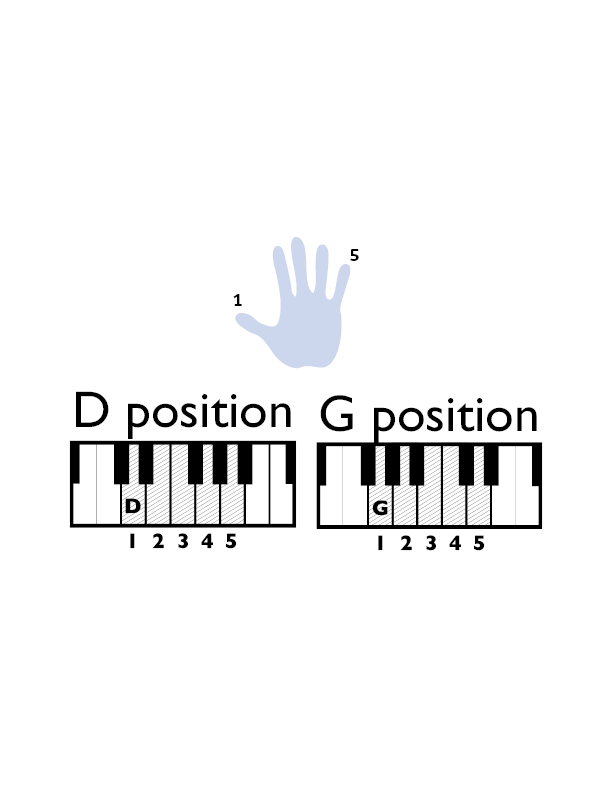
- Apply this idea to
 starting in different positions, not worrying about including any black keys; placing the thumb on the note D puts the D, E, F, G, and A under the five fingers, etc.
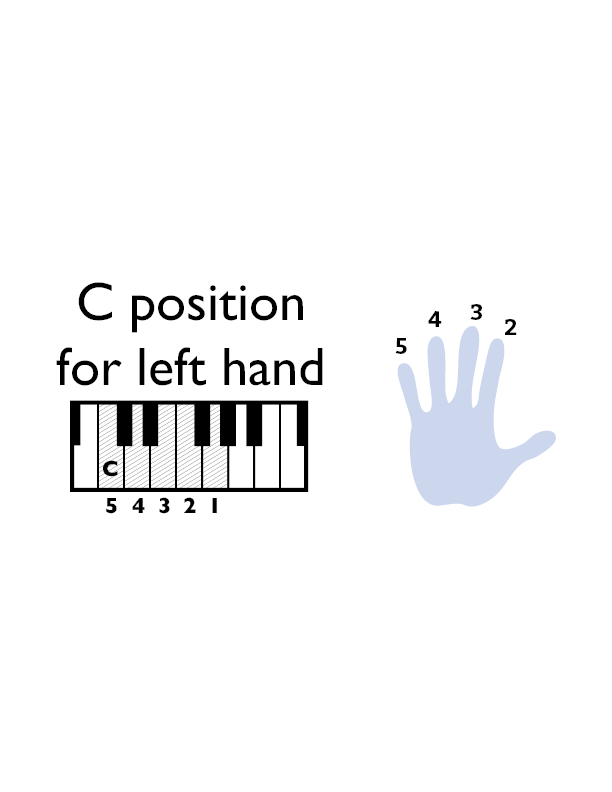
- Teach the left hand with this idea. Keep in mind that now the 5th finger (pinky) will be on the starting note and this is much more difficult for a beginning keyboard player.
National Core Arts Standards (Music)
Anchor Standard 4: Select, analyze, and interpret artistic work for presentation.
Example: General Music MU:Pr4.2.2 b. When analyzing selected music, read and perform rhythmic and melodic patterns using iconic or standard notation. (applies 1-4)
Common Core Correlation: CCSS.MATH.CONTENT.K.G.A.1 Describe objects in the environment using names of shapes, and describe the relative positions of these objects using terms such as above, below, beside, in front of, behind, and next to.